Learning how to tie a fishing fly is not difficult, but it does require the proper equipment and materials. It will be worth the effort you put into making your own flies if you catch that monster fish on one of your handmade creations. whether you want to tie flies as a hobby or start your own tackle company, you have come to the right pace.
Many people look at fly tying as a skill that is hard to learn, this couldn’t be further from the truth. While certain flies require a bit of skill and precision, most of the basic flies used by fly fishermen every day are pretty simple and easy to tie. In this article I will cover the basic materials needed to tie flies at the beginner level so that you can feel confident in your abilities to catch fish using your very own fishing flies.
It’s worth noting that it is not my intention to teach you how to fish a particular fly in this article but instead tie it. If you want to learn types of flies or what you need to get started fly fishing I have other articles for that.
This website is reader supported. Any purchases you make through links on this site earn us a commission at no additional cost to you. Thank you for your support!
Why Tie Fishing Flies in The First Place?
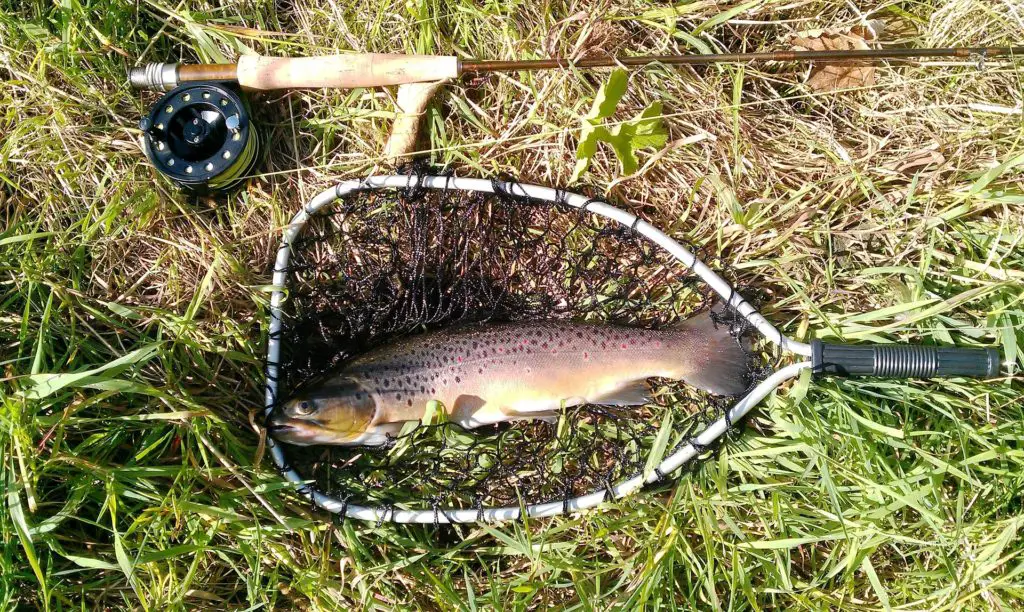
I will never forget the first fish I caught on my own fly. Although it wasn’t a world record it was a very important moment in my life. You see I had been tying flies since I was a child with the dream of one day being the best fly fisherman around. While that dream became less important later in life, the desire to tie fishing flies never went away.
Since then I have caught hundreds of trout on my own creations. Making fishing lures as a business may have been my intent originally but very quickly turned into a passion. My point is you cannot replace the feeling of accomplishment you get when catching a fish on a fly that you tied.
So why learn how to tie a fishing fly?
While fly fishing rivers, particularly areas of the Upper American River waterways, I never had the right fly to match the hatch. It was apparent that I was missing out on the chance of catching more fish just because my fishing fly wasn’t correct. So I decided I would learn how to tie my own fishing fly.
I grabbed a spare pill bottle that I used to keep old or worn out flies out of my backpack. Quickly I grabbed a couple of these small “bugs” that I found floating in the water. My goal was simple, tie a fly that looked just like these.
That same day I had 3 flies that looked remarkably similar to these small brown and red bugs that I pulled out of the water. The very next day I resumed my hunt to catch these fish that I had seen the day before. To my surprise I had hooked up on just my second cast of the morning.
I went on to catch 10 more fish that day all similar size and weight. I had never felt more accomplished as an angler than this day. The decision to pursue fly tying was an easy one for me and so my journey began.
Gathering Your Fly Tying Materials
As we go through some of this equipment don’t let it overwhelm you. You will be getting your hands on all this stuff in no time and building your confidence with each fly you tie. Everything involved in tying flies can be broken down into two main categories; fly tying tools and fly tying materials.
The tools needed to tie flies will remain the same for the most part as you start to tie different flies. You wont need all of the tools that are listed below for ever fly but they will come in handy eventually. It can be daunting to look at the prices of some of these tools as well. I have a solution to keep costs down that I will talk about later in this article.
Fly tying materials will vary from fly to fly. The materials used to tie a worm are not the same as the materials used to tie a dry fly. Most materials are fairly priced and you will accumulate them quickly. To start, a small variety of materials is all that is needed to tie flies and start catching fish.
Tools Needed to Tie Flies
Lets go over the necessary tools to get started tying flies as a beginner. The easiest way to do this is to break these up into two categories as we did earlier; required tying tools and optional tying tools.
The required tying tools is the equipment that will be used to tie every fly. The tools listed under optional equipment are used only for certain types of flies and I will make sure to outline those as well.
Equipment Required for Tying Flies
You WILL need these items to tie fishing flies; vise, Scissors, whip finisher and a bobbin. Lets talk about what each of these items are and what they are used for.
Fly Tying Vise
A fly tying vise is used to hold the hook in order for the tyer to have two free hands. The vise is the center pece to any fly bench. A vise has a few main characteristics that are common among most vises.

- Vises attach to a fixed object in order to stand upright
- Your vise will pinch the hook and hold it firmly in order to free our hands
- Usually vises have adjustable heights in order to move the workspace of the fly up or down.
- Most vises have the ability to swivel allowing you to work around the whole fly top to bottom without detaching and reattaching the fly.
Fly tying vises are the most essential part of tying flies. A vise in good working order will make tying flies much easier. Cheaper isn’t always better here. If there is one tool to make sure you invest in it is this one.
Fly Tying Scissors
Your fly tying scissors are going to get used a lot. This is typically the next most frequently used tool. Oftentimes while tying even the most basic flies you will find yourself using the scissors more than twice.

Typical kitchen scissors will not work here, not well anyways. These scissors are smaller in size, ofer just a small cutting area and may even be curved in order to get a closer cut. These style scissors allow us to get in close and make a clean cut to ensure a realistic look when finished.
You may get away with a less expensive pair of fly tying scissors but you will not regret it if you decide to invest in a nicer pair either. Remember that we will be using this tool multiple times for every single fly you tie.
The Bobbin
The bobbin is used to hold your thread while tying flies as well as providing a little tension so that we can make nice clean wraps with our thread. While it is entirely possible to tie flies with a bobbin I don’t recommend it. Bobbins allow our fishing flies to come out clean, precise and overall appealing for the fish.

Luckily bobbins are not going to break the bank. They start out in price around $2 and go up from there. I prefer a ceramic tube bobbin as it can fray the thread less than metal ones. Sometimes when too much pressure is applied to the thread it will rub on the corners of the tube that’s attached to the bobbin.
Another helpful tip for bobbins is to have multiple on hand. For the low cost of the bobbin I found that having one spooled with thread for each colorI was using is helpful. This takes the delay out of switching thread colors.
Whip Finisher Tool
The whip finisher tool is my hands down favorite tool. This tool is used to tie off and secure your thread to the fishing fly. Most commonly at the end of the fly when everything is finished you can use this tool to easily tie a firm knot.
The process can be confusing for some. I have attached a youtube video to better explain what a whip finisher actually does. The only other thing I will say is have this tool on your fly tying bench. It makes life really nice.
Equipment Recommended for Tying Flies
As you progress and learn more and more flies along your journey, you will inevitably start tying more complex flies. Flies that require deer hair or hackle such as dry flies will require a couple more tools to make your life easier.
Hackle Pliers
Hackle pliers are exactly what they sound like, small pliers that hold small little hackles for you so that you don’t have to.
What are hackles?
Hackles are a style of feather that are typically used when tying a fly that you want to float or sink. There are neck hackles and saddle hackles that you will typically use. These hackles are sometimes small and hard to pinch with your fingers.

Enter the hackle pliers. They have a softer gripping surface than regular pliers and provide just enough tension to hold the hackles so that you can manipulate them to your liking.
Bodkin Needle
The bodkin needle is a very useful tool that has multiple uses when tying flies. Bodkin needles can be used for the following purposes:
- Moving fibers of material
- Applying varnish or epoxy
- Removing unwanted debris from work surfaces

These are just a few ways a bodkin needle can help. Although these are not necessary for every fly that you will tie, you will appreciate their usefulness in the end.
Easy Flies to Tie As A Beginner
When starting out I recommend keeping your attention on only a couple flies at first. This will keep you from being overwhelmed as a beginner. Learning the most basic flies first will allow you to perfect the art of spooling your thread onto the bobbin, using the whip finisher and getting to know your vise. These are all skills that should be learned before trying to execute a streamer or dry fly type pattern.
Below I will list three flies that you will be able to tie with ease while just starting out. THe possibilities are endless here though as every fly can have variations added to them to make them look and present differently.
The Midge
Midges are a very common fly in the fly fishing world. They imitate flies that are commonly found in most waterways. Midges have multiple life cycles presenting multiple variations of fly patterns. Most importantly midges make up a large portion of a trout diet.
Wooly Bugger
The wooly bugger is another great fly that is easy to tie and catched tons of fish. It closely resembles tone flies, bait fish, leeches and hellgrammites. These food resources make up another important food grouping for a fish’s diet. Wooly Buggers can be tied in multiple sizes to target large and small fish. This fly is my hands down favorite when fly fishing stillwater such as lakes and a close second while fishing rivers
San Juan Worm
The San Juan Worm is quite possibly the easiest of the group to tie. Its design was created to mimic grasshoppers…….. Just kidding. Obviously these are imitating worms and that’s not too hard to do here. COnsisting of only 2 basic materials these flies can be tied easily making them a great fly when tying flies for beginners.
How to Get Started Trying Flies
Now that we have talked about what materials will be needed and what flies to tie as a beginner, how do we get started? There are two ways that you can get started in the hobby of fly tying. First, you can buy each item individually and accumulate equipment and materials on an as needed basis.
The pro’s to this is that you are not buying unwanted material and supplies. If you are a person that knows how to do a small amount of research to find out what materials are needed for the flies you want to tie, then you can save a lot of money by just getting the necessities.
The cons to this method is that you don’t know what you don’t have until you sit down to start tying your flies. Also, I promise you can never have too much material around.
The second method of purchasing fly tying equipment and materials is to buy a starter kit. These kits come loaded with all of the essentials and even non essential items that you will need. I buy these kits for friends as gifts when they take up an interest in the hobby.
Below are two fly fishing starter kits that I feel are the best. I have used or bought both of these kits over the years and I can attest the quality and the amount of materials that you will see in them.
Orvis Fly-tying Kit

Features
- Quality Tools
- Abundant Materials
- Instructional DVD
- Everything Needed to Get Started Tying Flies
The Orvis Fly Tying kit is leaps and bounds better than any other starter fly tying kit out there in my opinion. The sheer quality of the equipment supplied makes it worth the buy. Other than that the materials that come in this kit are good quality.
The one knock on this kit is the vise. I have ties hundreds of flies with this vise and it does work well. However, you can find better vises in under $50 range that are better than this one.
Dr.Fish Fly Tying Kit

Features
- Good Overall Material Selection
- Great Starter Vise
- Budget Friendly
What I love about the Dr. Fish Fly Tying Kit is the vise. This is a far better vise than the one that comes in the Orvis kit. The trade off is that you get far less materials here and the other tools are not quite the quality.
Both of these kits are a great place to start. The Orvis kit is far superior but if your looking to save some cash the Dr.Fish fly tying kit is a great runner up.
Final Thoughts on Tying Flies for Beginners
It is my hope that you feel somewhat comfortable with getting started tying flies for a beginner. Having an understanding of the items outlines n this article and how they are used as well as some resources to get started tying flies should help you in your soon to be new hobby.
If I left something out or you have any questions regarding this article please feel free to leave a comment in the section below. I will be happy to answer your questions to the best of my abilities.
Do you know someone that is looking into getting started tying flies? Use any of the social icons below to share in with them. It really means a lot to us when you do.